








See it. Try it. Make it yours.

Short walkthroughs of the real Mac app. Start with your first recording, or jump to the tool you want to learn. Press play when you’re ready.

Record your first video

0:39 · Watch at your own pace

Read the transcript

Here's how to make your first video, in four quick steps. Step one. Click New recording, or press Command Shift R. Step two. Choose what to record: your whole screen, one window, or just an area. Step three. Switch your camera and microphone on or off, then press Start. Step four. When you're done, press Command Shift 2 to stop. It works from any app. Your video opens in the editor, with its script ready. Delete words to cut them, then click Export. That's your first video. Easy.

Explore this feature →

Set up permissions

0:43 · Watch at your own pace

Read the transcript

Before you record, your Mac needs to say yes. Here's how to set up permissions. Screen Recording lets the app record your screen. Microphone and Camera are only needed if you use them. Step one. Open Settings, then Permissions. Step two. Click Allow next to anything that isn't allowed yet. Step three. If System Settings opens, switch Make It a Video on there. Step four. For Screen Recording, quit and reopen the app. Your Mac only applies it after a restart. Still stuck? Switch it off and on again, then reopen the app. You're ready to record.

Explore this feature →

Edit with your script

0:34 · Watch at your own pace

Read the transcript

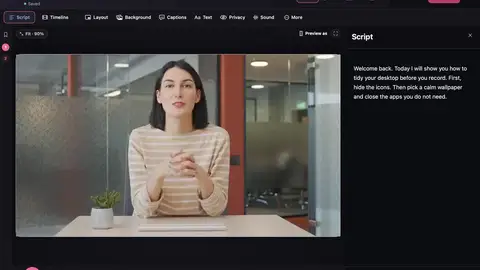
In Make It a Video, your script is the editor. Here's how it works. When your recording opens, everything you said appears as words. Delete words, and they're cut from the video. Select a sentence, and drag it to move that part. Click any word to jump straight there. Type to fix a word in your captions. Your voice stays exactly the same. And to clear out every um and long pause in one go, use Tidy. Editing a video is now as easy as editing a document.

Explore this feature →

Zooms and pointers

0:43 · Watch at your own pace

Read the transcript

Want your demos to look professional? Here's how to use zooms and pointers. Add a zoom at the playhead, and the video moves in on that spot, then back out. Automatic zoom follows your cursor and your clicks. Turn on Sharper zoom to keep small text crisp. Your cursor is recorded separately, so you can restyle it later. Make it bigger, smooth its movement, or highlight your clicks. For more fun, try a playful pointer. A hand, a cat paw, a magic wand and more. Each one has its own click animation and sound. Press Command P in the editor to switch one on. Now every click is easy to follow.

Explore this feature →

Looks

0:39 · Watch at your own pace

Read the transcript

Make every video look like you, with Looks. A look keeps your whole style in one place: your background, the frame around your screen, your camera shape, your caption style, and your brand. Open Looks in the sidebar, and choose New look. Change the background, frame, camera, captions and brand. The preview updates as you go. Name it, then choose Save look. Choose Use for new videos, and every new recording starts with it. In the editor, click any look to apply it straight away. One click, and you're on brand.

Explore this feature →

Captions

0:35 · Watch at your own pace

Read the transcript

Here's how to add captions to your video. Captions are made on your Mac, from your voice. Nothing is uploaded. Open Captions in the editor. Pick a style from the gallery. Each tile shows the real look. Choose Customise to change the colours, font, size, position and motion. Then save it to My styles, ready to use again. Spotted a wrong word? Just type to fix it in the script. And to use your style on every new video, set it in Settings, Captions.

Explore this feature →

Clean sound

0:38 · Watch at your own pace

Read the transcript

Great sound makes a great video. Here's how to clean it up. Open Sound in the editor. Turn on Remove background noise, then pick a strength: Light, Medium or Strong. Next, pick a voice style: Clear, Warm, Podcast, Broadcast or Crisp. Press play to hear it on your own voice. Then add music. Choose Find music, or add your own file. Lower music under speech is already on. The music dips when you talk, and comes back up in the gaps. Your video now sounds as good as it looks.

Explore this feature →

Export and publish

0:38 · Watch at your own pace

Read the transcript

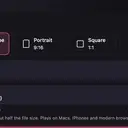
Ready to share? Here's how to export your video. First, choose its shape at the top of the editor: wide, vertical, square, or four by five. Making a short? Choose Preview as, to see where TikTok, Reels or Shorts buttons will sit. Then click Export, or press Command E. Pick a size. Ten eighty p suits most places. Choose where to save. You can keep editing while it finishes. To post it, open the project's menu and choose Publish. It gets your title and caption ready, and opens the site for you.

Explore this feature →

Teleprompter and iPhone

0:36 · Watch at your own pace

Read the transcript

Read your script while you record. Here's the teleprompter. It sits near your camera, and never shows in your video. Open it from recording setup, or from Quick actions with Command K. Paste your script, or import a file. Turn on voice follow, and it scrolls as you speak. Or choose a steady speed. Press Start, and the script scrolls with you. Want to show an app on your phone instead? Connect your iPhone or iPad with a cable, unlock it, and tap Trust. Then choose it in recording setup, and press Start.

Explore this feature →

Titles, transitions and templates

0:39 · Watch at your own pace

Read the transcript

Here's how to give your video a finished feel, with titles, transitions and templates. To add a title, move the playhead, open Text, and choose Add graphic. Pick a style, then type your words. Titles use your look's accent colour, so they always match. For transitions, click the small plus where two clips meet, and choose one. Or use it at every cut. And with Pro, start from a template. It sets up your shape, look, captions, titles and chapters, before you even record. Your video, finished in minutes.

Explore this feature →

Google Drive sharing

0:33 · Watch at your own pace

Recorded before sharing launched. Google Drive sharing is now available; see current sharing details.

Read the transcript

Here's a sneak peek at sharing from your own Google Drive. It's coming soon. Your videos are saved in your own Drive, so they always stay yours. Open Settings, then Sharing, and connect your Google Drive. Then share a video with a link. People watch it on a clean page, and Google never shows. Free lets you share up to three videos at a time. With Pro, add your own colours and logo, a password, and even your own web address. Watch this space.

Explore this feature →

Brand kits

0:32 · Watch at your own pace

Read the transcript

Making videos for clients? Here's how brand kits work. A look can carry a whole brand: a logo, a colour, a font, a label, and an opening or closing clip. The quickest way to start is Create from my website. Type the web address. The app reads the colours and the logo for you. Check them, pick an opening and a closing, and save it as a look. Now every video for that client is on brand, with one click. Brand kits come with Pro.

Explore this feature →

Guides from your video

0:34 · Watch at your own pace

Read the transcript

Turn one recording into a step by step guide. Here's how. In Export, choose Make a guide. Each step gets a short instruction from what you said, and a picture of the moment you clicked. Private details are covered in every picture. Edit, merge or remove steps, and move the hotspot if you need to. Then choose Save guide. You get a branded PDF, and a web page that people can click through, step by step. One video. A guide for free. Guides come with Pro.

Explore this feature →

Write, edit and narrate

0:34 · Watch at your own pace

Read the transcript

Stuck on what to say? Let Make It a Video help you write, edit and even narrate. Write my script turns a short brief into an outline, then a full script for your teleprompter. Tell it what the video is about, who it's for, and what they should be able to do after. Edit by asking turns plain requests into edits you can preview and undo. And Voiceover from script speaks each sentence with a voice on your Mac, then places it on its own track. It all runs on your Mac. Nothing leaves it.

Explore this feature →

Make your next video on your Mac.

  • Free to startRecord, edit and save a finished video on the free plan.
  • No watermarkNot even on the free plan.
  • Stays on your MacYour projects and recordings are saved on your Mac.

Requires macOS 15 or later.